![[IDEA] Intellij + Github 연동하기](https://img1.daumcdn.net/thumb/R750x0/?scode=mtistory2&fname=https%3A%2F%2Fblog.kakaocdn.net%2Fdna%2Fc79Gml%2FbtrorA5f8iK%2FAAAAAAAAAAAAAAAAAAAAAIA-GUq2swlelJLmIFLSFVmgRW0ddSiFJKQmJT86faru%2Fimg.png%3Fcredential%3DyqXZFxpELC7KVnFOS48ylbz2pIh7yKj8%26expires%3D1753973999%26allow_ip%3D%26allow_referer%3D%26signature%3DMremMea4g0XsEl9%252FCX7xOLAn3Lc%253D)
Intellij IDEA에서 생성한 프로젝트를
Github와 연동하는 방법을 알아보자.
먼저, PC에 Git 설치가 완료되어야 한다.
(Git 설치 방법은 생략)
1. Git & Github Plugin 확인하기
Settings > Plugins
Git과 GitHub가 installed 되어 있는지 확인한다.

2. Git 실행파일 결로 설정
Settings > Version Control > Git
Path to Git executable 에서 git 실행파일을 선택하고 Test를 클릭하여
실행되는지 확인한다.

3. Github Repository 생성하기
▶ Repository name : 저장소 이름
▶ Description : 저장소에 대한 설명
▶ Public / Private : 공개 / 비공개 여부 선택
▶ Initialize this repository with : 프로젝트 설명 페이지 README 파일 생성 등 옵션 선택

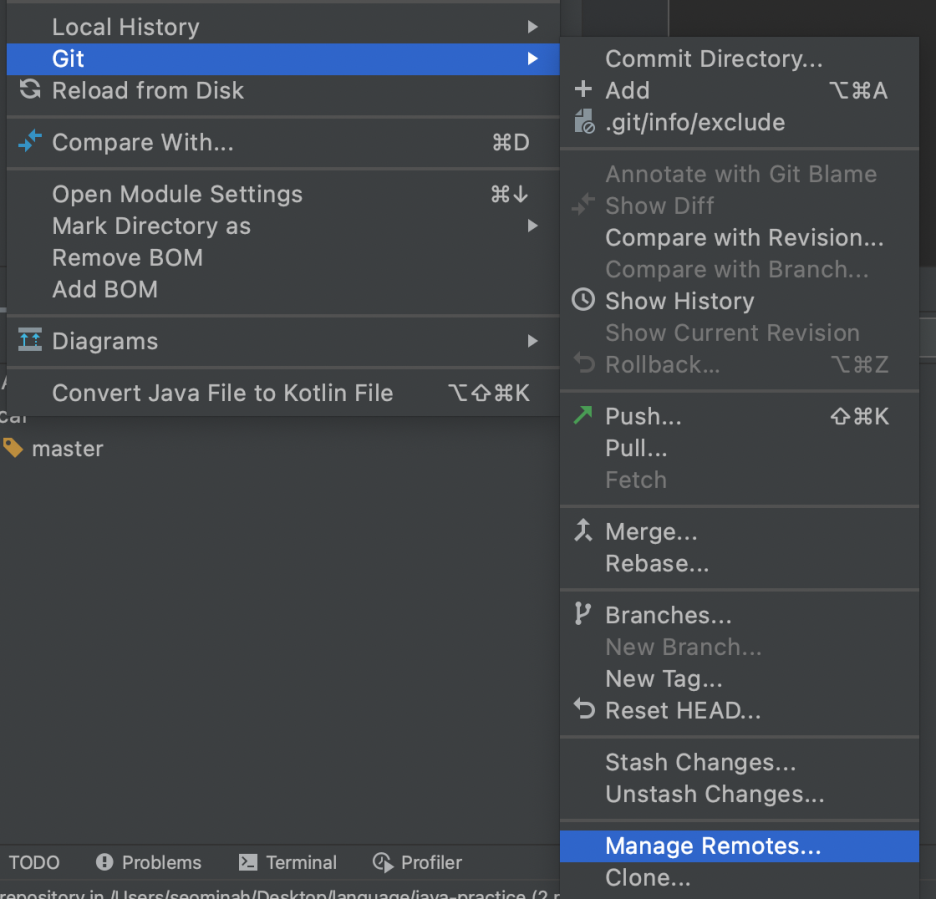
4. Github 계정 등록하기
Settings > Version Control > Github
+ 버튼을 클릭하여 GitHub 계정을 입력하여 로그인한다.
연결된 계정을 클릭하고 ✔ 를 클릭하면 해당 계정이 디폴트로 설정된다.

5. Remote Repository 등록하기
VCS > Enable Version Control Integration

Git 선택 후 OK

해당 프로젝트 파일이 Git의 관리하에 들어갔다는 것을 확인

+ 버튼을 클릭하여
Name : origin
URL : gitbut Repository 주소
를 입력하고 OK

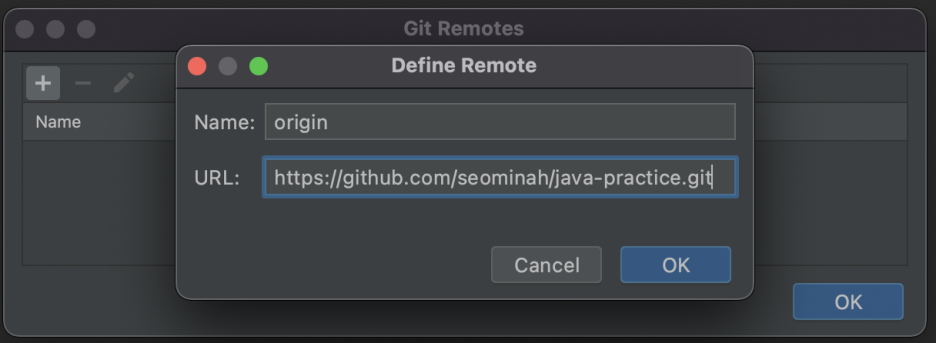
Git 연동 완료 : )

6. init Commit and push 하기
해당 프로젝트에 우측 키 > Git > Add

파일 상태별 색상은 다음과 같다.
빨간색 - add 되지 않은 파일
초록색 - add 된 파일
파란색 - 수정된 파일
하양색 - commit 된 파일
회색 - 삭제된 파일

Git > Commit
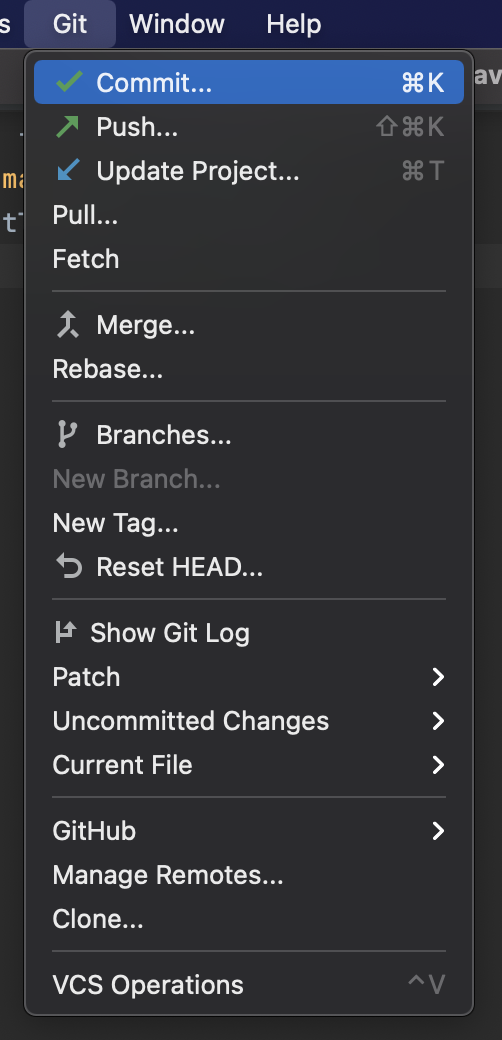
커밋해줄 파일들을 선택하고 커밋 메세지를 작성한 후
Commit and Push를 클릭한다.

push 창에서 변경할 파일을 확인한 후 push한다.

GitHub Repository에 잘 반영된 것을 확인한다.
성공 : )
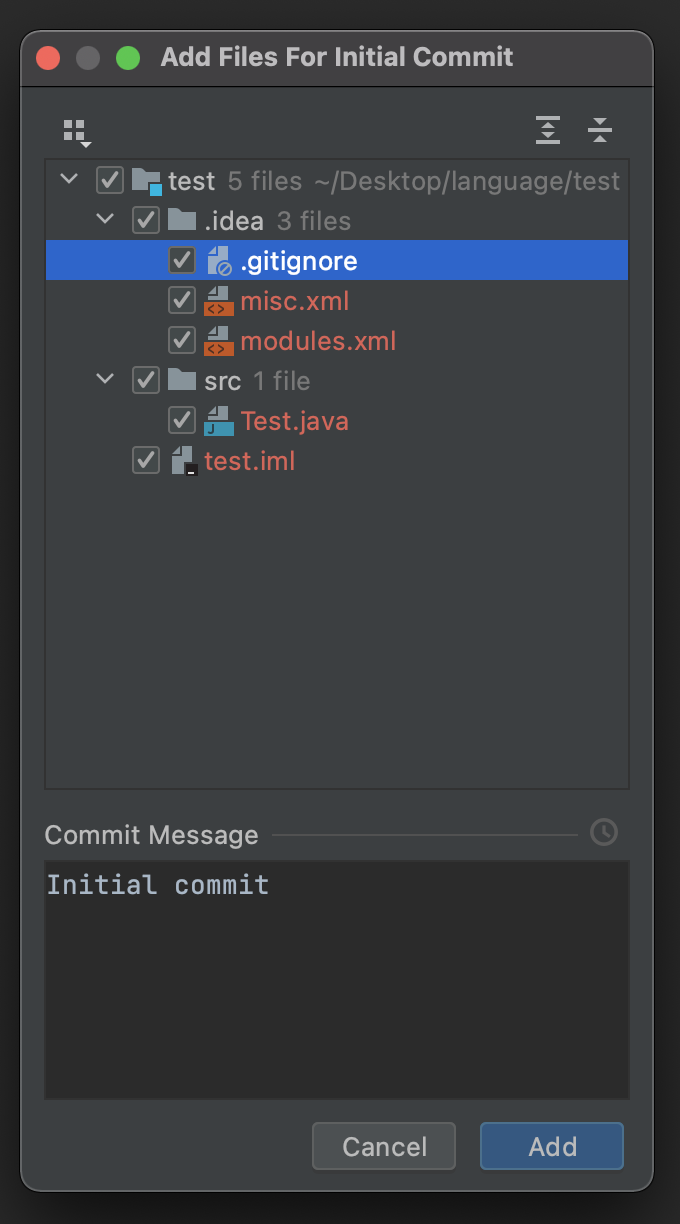
GitHub에서 Repository를 따로 만들지 않고
Intellij에서 바로 연동하는 방법도 있다.
Intellij에서 GitHub 연동하기
VCS > Share Project on GitHub

해당 프로젝트명으로 Repository Name을 설정하고
저장소 설명을 작성한 후 Share

add할 파일들을 선택하는 창이 뜨며
add할 파일을 선택하고 커밋 메세지 작성 후 Add

해당 프로젝트가 GitHub와 연동된 것을 확인할 수 있다.

프로젝트에서 내용을 수정하고

Git > Commit

커밋 메세지를 추가 후 Commit and push

push할 파일을 확인 후 push하면
GitHub Reposiroty에 잘 반영된 것을 확인할 수 있다.

Intellij IDEA에서 GitHub 연동하는 두 가지 방법을 알아봤다.
아직 Git을 다루는 방법이 익숙하지 않지만
공부한 내용들을 GitHub에 기록하면서
부족한 부분을 채워나갈 예정이다.
'개발환경' 카테고리의 다른 글
| [Ubuntu] open jdk11 설치하기 및 환경변수 설정 (0) | 2022.05.01 |
|---|---|
| [DB] H2 데이터베이스 설치 on M1 MacOS AND Windows (0) | 2022.03.06 |